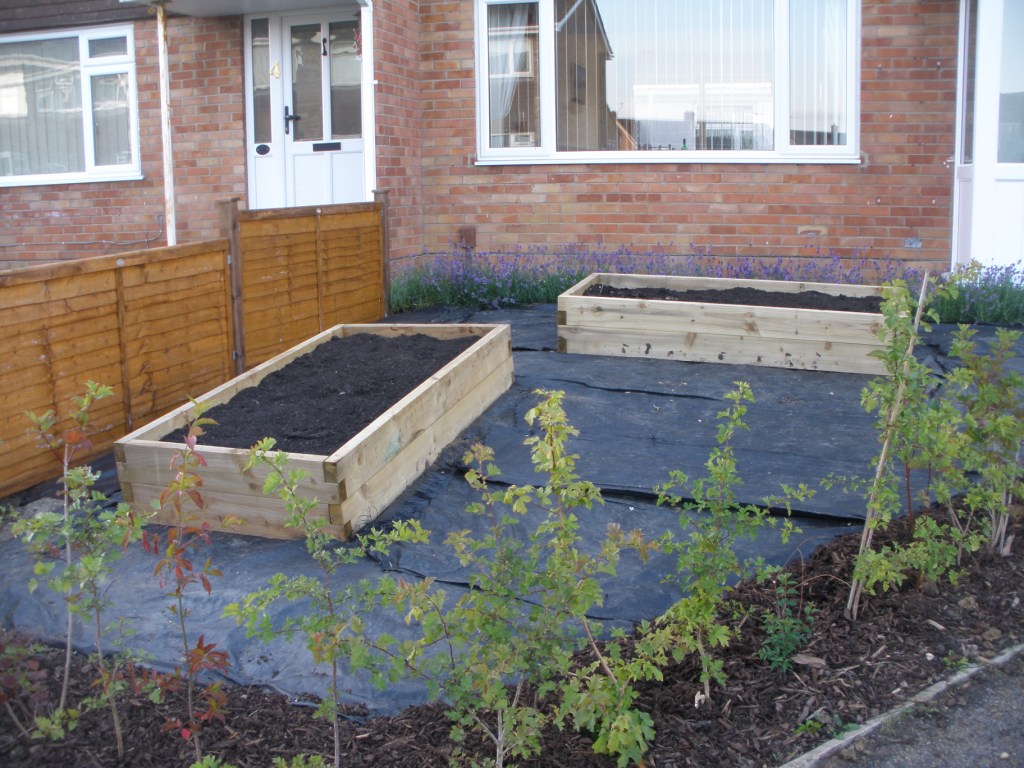
This is a continuation of the evolution of our front garden. For the first part,
click here.
So the ditch was dug and the hedge was ordered. It was delivered promptly and externally looked like a bunch of dead sticks, but they were biding their time to burst into life! If I remember rightly we planted them around March, potting up the remaining 5 or 6 into pots for replacements if we needed them. By June they were all alive and kicking.
In the meantime we got to thinking about the rest of the front garden. We decided to get rid of the remaining grass, especially the lump in the middle, and lay gravel. We'd also add a couple of raised beds, not only to add interest, but to also to keep the insects happy as we'd taken away their muddy grass habitat.
 |
| Here's the bird's eye view. We planted the lavender soon after moving in, this was their second year in the front garden and they were looking fab. |
 |
| As you can see there is still a bit of a slope in the garden, but it was much better than it was before. |
So we put out the raised beds. I had kept some of the grass to use for the bottom of the beds, as the grass rots down it'll provide food for the plants, plus it saved some trips to the tip. We topped up the beds with compost purchased from the local recycling centre for £1 a bag - we filled those bags well!
We ordered the gravel, choosing Solent Gold as this was similar to what is in the other gardens down the street. If I remember correctly we ordered 800kg of the stuff. That was a fun afternoon!
Almost a year on from sorting the front garden, how has it fulfilled its objectives?
 |
| I really like the mix of wood chippings and gravel. We chose not to have edging between the two, as I wanted it to have a more nature look. |
We're really pleased with the garden. Only one hedge plant needed to be
replaced. To ensure that the hedge would bush out at the bottom I took
some time to carefully prune all of the plants back. Because there are quite a few different plants in this hedging mix, the hedge was at very different heights by the end of year one. Therefore, while a lot of books say to only prune by a third, some plants were pruned by at least half to ensure that all of the hedge was at the same height. As you can see below, the hedging is bushing out nicely at the bottom. This will create a good barrier and their won't be an unsightly gap at the bottom of the hedge. The double digging seems to have worked well too. The gravel stops too much water seeping into the soil, although quite often the water runs over the hedge border and into the guttering in the road - only time will tell.
 |
| Really enjoying the mix of plants in this mix. We're looking forward to next year, when we hope that they'll start flowering. Fingers crossed! |
So, other than pruning the hedge, it's very low maintenance. We need to weed the edge of the pavement, but that's it really. All of the plants in the raised beds are doing very well, as you'll see in the April photos of In the garden that I'll put up at the end of the month. And while it may not be providing much privacy yet, it will do in years to come. For the meantime it gives passersby something to look at other than our front window!
Thanks for reading, I hope that you enjoyed the post. If you've written posts on gardening projects like this, I'd love to read them, so feel free to leave a comment!